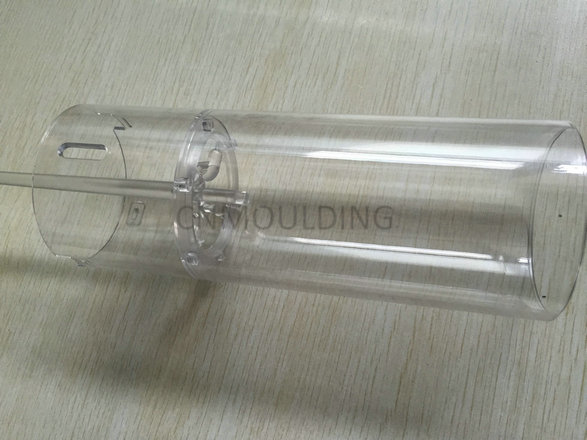
Transparent plastic injection molding is essential for industries requiring high optical clarity, such as medical devices, automotive lighting, and premium consumer electronics. However, achieving a “crystal clear” finish is technically challenging. Any minor inconsistency in temperature, pressure, or material purity can lead to visible flaws.
Below, the engineering team at CNMOULDING analyzes the five most common defects in transparent molding and provides actionable technical solutions.
1. Silver Streaks (Crazing)
Silver streaks refer to fine, needle-like frosty lines on the surface of the transparent part. These are often caused by surface moisture or excessive thermal degradation.
- The Cause: Inadequate material drying (especially for hygroscopic materials like PC or PMMA) or excessive melt temperature.
- The Solution: * Pre-drying: Ensure resins are dried using a desiccant dryer at the specified temperature and time.
- Temperature Control: Reduce the nozzle and barrel temperature to prevent material decomposition.
- Back Pressure: Increase back pressure slightly to exhaust trapped gases in the melt.
2. Weld Lines (Knit Lines)
Weld lines appear where two or more flow fronts meet. In transparent parts, these lines are not just structural weaknesses but also highly visible aesthetic defects.
- The Cause: Low melt temperature or insufficient injection pressure, causing the flow fronts to cool before they can fully fuse.
- The Solution:
- Thermal Management: Increase the mold and melt temperatures to improve flowability.
- Injection Speed: Use high-speed injection to ensure the fronts meet while still in a highly fluid state.
- Gate Optimization: Relocate gates to areas where weld lines are less visible or structurally critical.
3. Sink Marks and Internal Voids
Sink marks are surface depressions, while voids are vacuum bubbles trapped inside thick sections. Both compromise the optical integrity of the part.
- The Cause: Volumetric shrinkage during the cooling phase, often due to insufficient packing pressure or overly thick wall designs.
- The Solution:
- Packing & Holding: Increase the holding pressure and duration to “feed” more material into the cavity as it shrinks.
- Wall Thickness: Maintain uniform wall thickness. If thick sections are necessary, ensure the gate is large enough to prevent premature freezing.
- Cooling Time: Extend the cooling cycle to ensure the part solidifies evenly.
4. Flow Marks (Ripples)
Flow marks appear as wave-like ripples or “fingerprints” centered around the gate, disrupting the transparency.
- The Cause: The melt cools too quickly as it enters the cavity, or the injection speed is inconsistent.
- The Solution:
- Mold Temperature: Raising the mold temperature is the most effective way to eliminate ripples.
- Injection Profile: Optimize the injection speed profile (start slow, then speed up) to ensure a steady laminar flow.
- Nozzle Diameter: Check if the nozzle or gate size is too small, which can cause excessive shear heat or flow restriction.
5. Black Spots and Impurities
For transparent products, even a microscopic speck of dust or charred material can lead to a 100% rejection rate.
- The Cause: Contamination in the raw material, carbonized resin in the barrel, or poor workshop environment.
- The Solution:
- Cleanliness: Operate in a controlled, clean-room environment for high-end optical parts.
- Purging: Regularly purge the barrel with specialized cleaning compounds to remove any degraded material.
- Material Inspection: Use a magnetic separator and high-quality filters to prevent metal or foreign debris from entering the mold.
Conclusion
Achieving perfection in transparent plastic injection molding requires a synergy of advanced equipment, precision mold design, and strict process control. At CNMOULDING (Shanghai), we specialize in high-precision transparent molding for the medical and automotive sectors.
Looking for a reliable China mold maker for your transparent project? Contact our engineers today for a professional DFM (Design for Manufacturing) analysis.